


A WordPress plugin is a piece of software that extends or enhances the functionality of a WordPress website. These plugins can add new features, modify existing ones, or provide various tools to help you manage and customize your website. Creating a WordPress plugin involves several steps:
1. Plan Your Plugin:
Before you start coding, have a clear idea of what your plugin will do. Define its purpose, features, and how it will integrate with WordPress. Consider if a similar plugin already exists, and if not, what makes your plugin unique.
2. Set Up Your Development Environment:
To develop a WordPress plugin, you’ll need a local development environment or a staging site. You can use software like XAMPP, MAMP, or use a development site provided by your hosting provider.
3. Create a Plugin Folder:
In your WordPress installation, navigate to the “wp-content/plugins” directory and create a new folder for your plugin. This folder will house your plugin files.
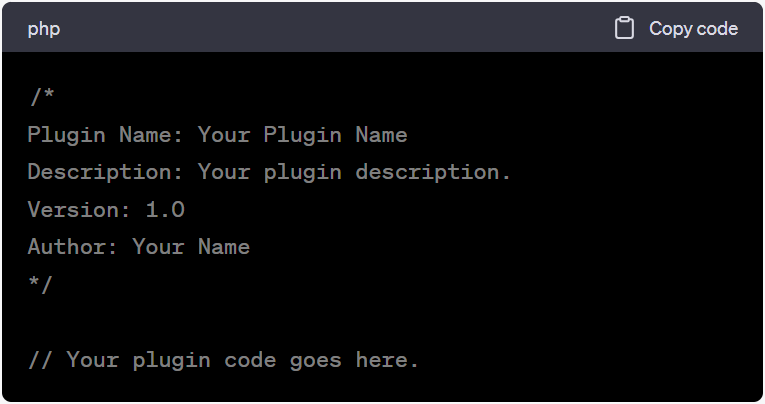
4. Create the Main PHP File:
Every WordPress plugin needs a main PHP file. This file must contain a plugin header with essential information like the plugin name, version, description, author, and other details. For example:
5. Write the Plugin Code:
Develop the core functionality of your plugin in the main PHP file or organize it into separate PHP files within your plugin folder. You can use WordPress functions, hooks, and filters to interact with the WordPress system and its database.
6. Add Hooks and Filters:
Use WordPress hooks (actions and filters) to integrate your plugin with the WordPress core and other plugins. Actions allow you to execute code at specific points in the WordPress lifecycle, while filters enable you to modify data before it’s displayed.
7. Create Settings Pages (Optional):
If your plugin requires user configuration, you can create a settings page using the WordPress Settings API. This allows users to customize the plugin’s behavior.
8. Add Styles and Scripts (Optional):
If your plugin requires custom styles or scripts, you can enqueue them using WordPress functions like `wp_enqueue_style` and `wp_enqueue_script`.
9. Test Your Plugin:
Thoroughly test your plugin in different scenarios to ensure it works correctly. Debug any issues and make necessary improvements.
10. Document Your Plugin:
Provide documentation for users, including installation instructions, configuration options, and any other relevant details. A readme.txt file is commonly used for this purpose.
11. Package Your Plugin:
Create a zip file containing your plugin folder and files. This is the format in which you’ll distribute your plugin.
12. Submit to the WordPress Plugin Repository (Optional):
If you want to make your plugin available to the public, you can submit it to the official WordPress Plugin Repository. This involves following their guidelines and undergoing a review process.
13. Promote Your Plugin:
If you want to gain users, you may need to promote your plugin through your website, social media, and other channels.
14. Maintain and Update:
Continuously maintain and update your plugin to ensure compatibility with the latest WordPress versions and security fixes.
Creating a WordPress plugin requires some knowledge of PHP, WordPress architecture, and best practices. It’s also a good idea to study existing plugins and WordPress documentation to get a better understanding of how things work.

Building Your Vision Into Reality
Estimate ProjectOr call us now 91 98790 98469


